Gazelle Keycloak
Introduction
The purpose of this document is to guide you through the installation process of the Keycloak. This identity and access management tool is used by Gazelle tools to authenticate users.
Installation
Keycloak should be run inside a Docker container.
Database creation
Keycloak will use a PostgreSQL database. You will need to report the configuration in the environment variables needed at runtime.
su postgresql
psql
postgres=# CREATE USER keycloak;
postgres=# ALTER USER keycloak WITH ENCRYPTED PASSWORD 'keycloak';
postgres=# CREATE DATABASE "keycloak" OWNER keycloak;
postgres=# \q
exit
As SQL :
CREATE USER keycloak;
ALTER USER keycloak WITH ENCRYPTED PASSWORD 'keycloak';
CREATE DATABASE "keycloak" OWNER keycloak;
Database is initialized by Keycloak at runtime.
Dev deployment
Clone gazelle-keycloak projet.
Follow instructions given in README.md.
“gazelle” realm is configured as in this guide.
Docker image
Installation can be performed on a system with Docker.
Keycloak is deployed using docker-compose in this guide, but can run in any orchestrator or plain Docker daemon.
Use the following Dockerfile as a base for your Docker image :
FROM quay.io/keycloak/keycloak:18.0.0

USER root
# install wget
RUN microdnf install -y wget
USER keycloak

# create a certificate for serving HTTPS
RUN keytool -genkeypair -storepass password -storetype PKCS12 -keyalg RSA -keysize 2048 -dname "CN=server" -alias server -ext "SAN:c=DNS:localhost,IP:127.0.0.1" -keystore conf/server.keystore

# activate metrics & health endpoints
ENV KC_METRICS_ENABLED=true
ENV KC_HEALTH_ENABLED=true
# Keycloak will use a Postgres database
ENV KC_DB=postgres

ENV GAZELLE_KEYCLOAK_VERSION=1.2.4

# Gazelle specific stuff

# CAS protocol support
RUN wget -O /opt/keycloak/providers/gazelle-keycloak-cas-protocol.jar "https://gazelle.ihe.net/nexus/service/local/repositories/releases/content/net/ihe/gazelle/keycloak/gazelle-keycloak-cas-protocol/${GAZELLE_KEYCLOAK_VERSION}/gazelle-keycloak-cas-protocol-${GAZELLE_KEYCLOAK_VERSION}.jar"

# Gazelle user federation
RUN wget -O /opt/keycloak/providers/gazelle-keycloak-provider.jar "https://gazelle.ihe.net/nexus/service/local/repositories/releases/content/net/ihe/gazelle/keycloak/gazelle-keycloak-provider/${GAZELLE_KEYCLOAK_VERSION}/gazelle-keycloak-provider-${GAZELLE_KEYCLOAK_VERSION}.jar"

# Gazelle theme
RUN wget -O /opt/keycloak/providers/gazelle-keycloak-theme.jar "https://gazelle.ihe.net/nexus/service/local/repositories/releases/content/net/ihe/gazelle/keycloak/gazelle-keycloak-theme/${GAZELLE_KEYCLOAK_VERSION}/gazelle-keycloak-theme-${GAZELLE_KEYCLOAK_VERSION}.jar"

RUN /opt/keycloak/bin/kc.sh build
Configuration
Configuration is performed using environment variables.
It might be needed to mount some files in container for some cases (TLS certificates, …).
Here is a docker-compose.yml configuring Keycloak in a typical environment :
version: "3.9"
services:
  keycloak:
    # location of Dockerfile
    build: .
    restart: on-failure
    volumes:
      # folder containing certificates
      # - "/etc/letsencrypt:/etc/letsencrypt:ro"
    environment:
      # Keycloak admin user
      # Created on first start
      KEYCLOAK_ADMIN: admin
      KEYCLOAK_ADMIN_PASSWORD: admin

      # Connection to Keycloak DB
      KC_DB_URL: jdbc:postgresql://postgres:5432/keycloak
      KC_DB_USERNAME: keycloak
      KC_DB_PASSWORD: keycloak

      # Keycloak is running behind a reverse proxy, reencoding TLS
      KC_PROXY: reencrypt
      KC_HOSTNAME: keycloak.localhost
      # if Keycloak is served in a relative path via reverse proxy
      # KC_HTTP_RELATIVE_PATH: /auth

      # HTTPS certificate as PEM files
      # KC_HTTPS_CERTIFICATE_FILE: /etc/letsencrypt/keycloak.crt
      # KC_HTTPS_CERTIFICATE_KEY_FILE: /etc/letsencrypt/keycloak.key
For more specific configurations and edge cases, refer to Keycloak Guides :
- TLS
- Hostname
- Reverse proxy
- All configuration options are available here
Realm configuration
Connect on Keycloak
Once Keycloak is started, it needs to be configured before being used against Gazelle suite.
First, connect to Keycloak :
- URL is Keycloak URL +
/admin/ - user/password are defined by
KEYCLOAK_ADMIN/KEYCLOAK_ADMIN_PASSWORD
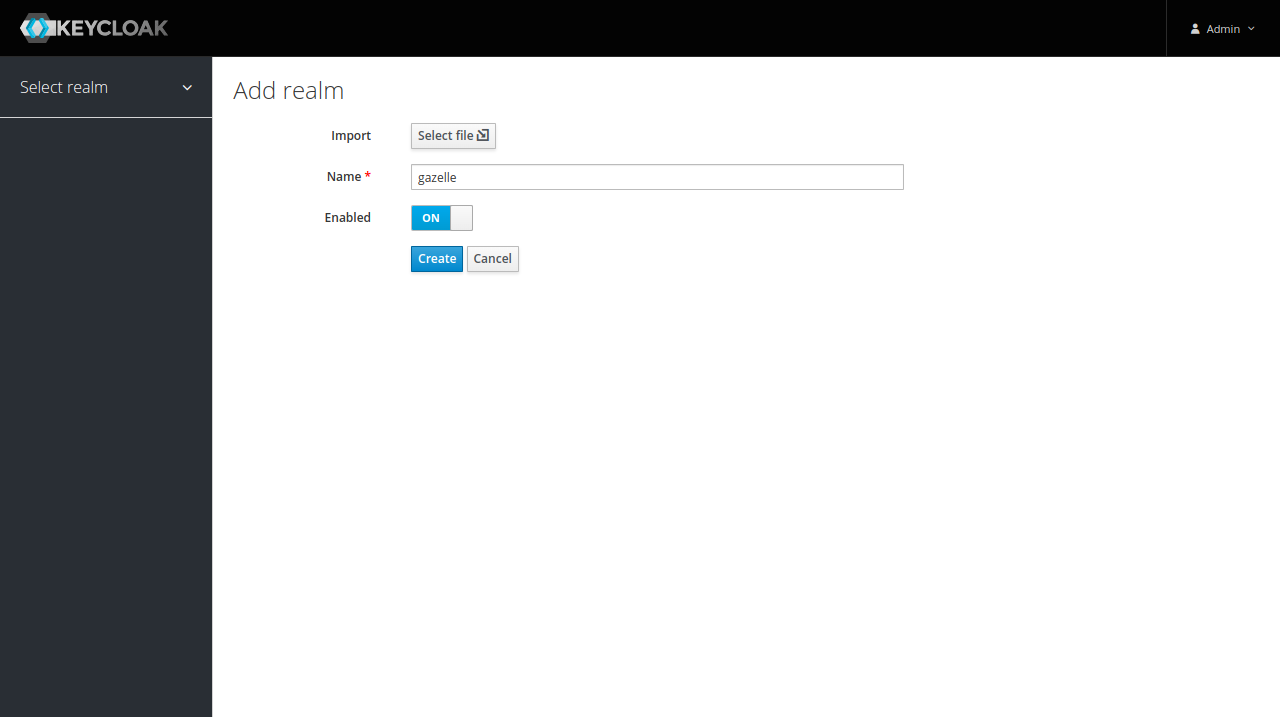
Add realm
Once connected, add a realm by clicking “Add realm” from realm selector :
Select a name for your realm, gazelle is a good choice. Then click on “Create”.
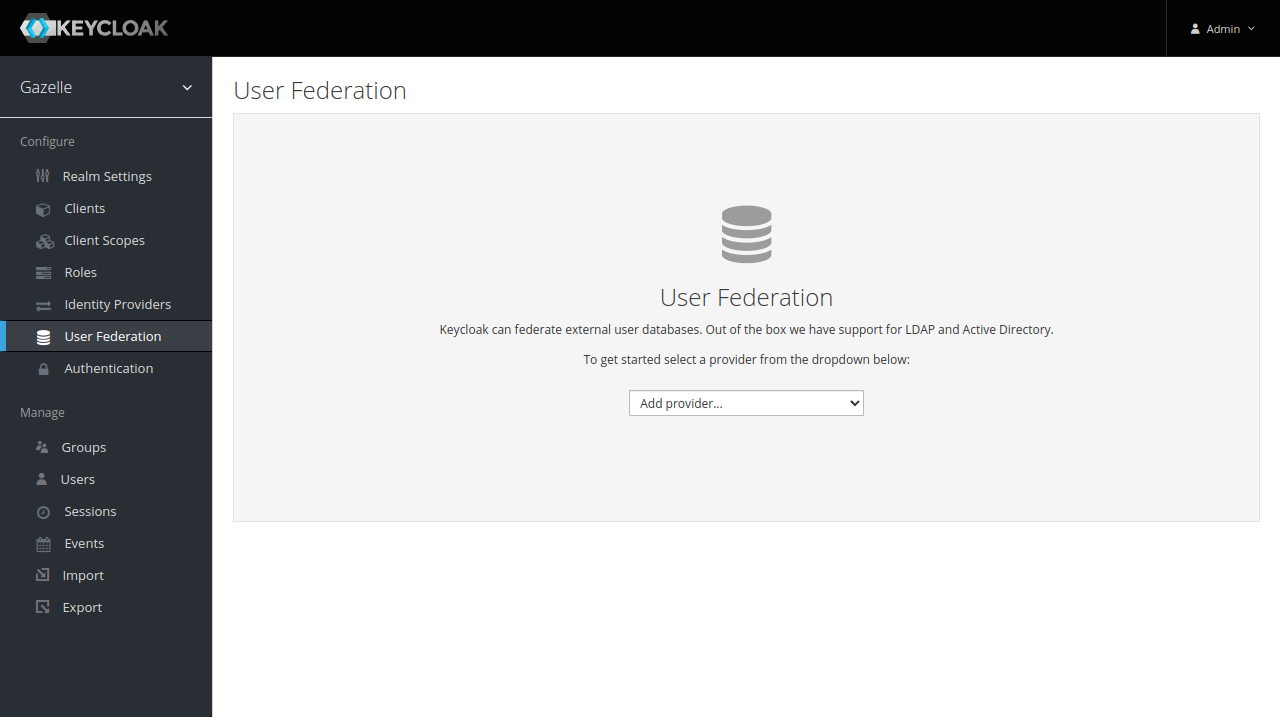
Gazelle User Federation
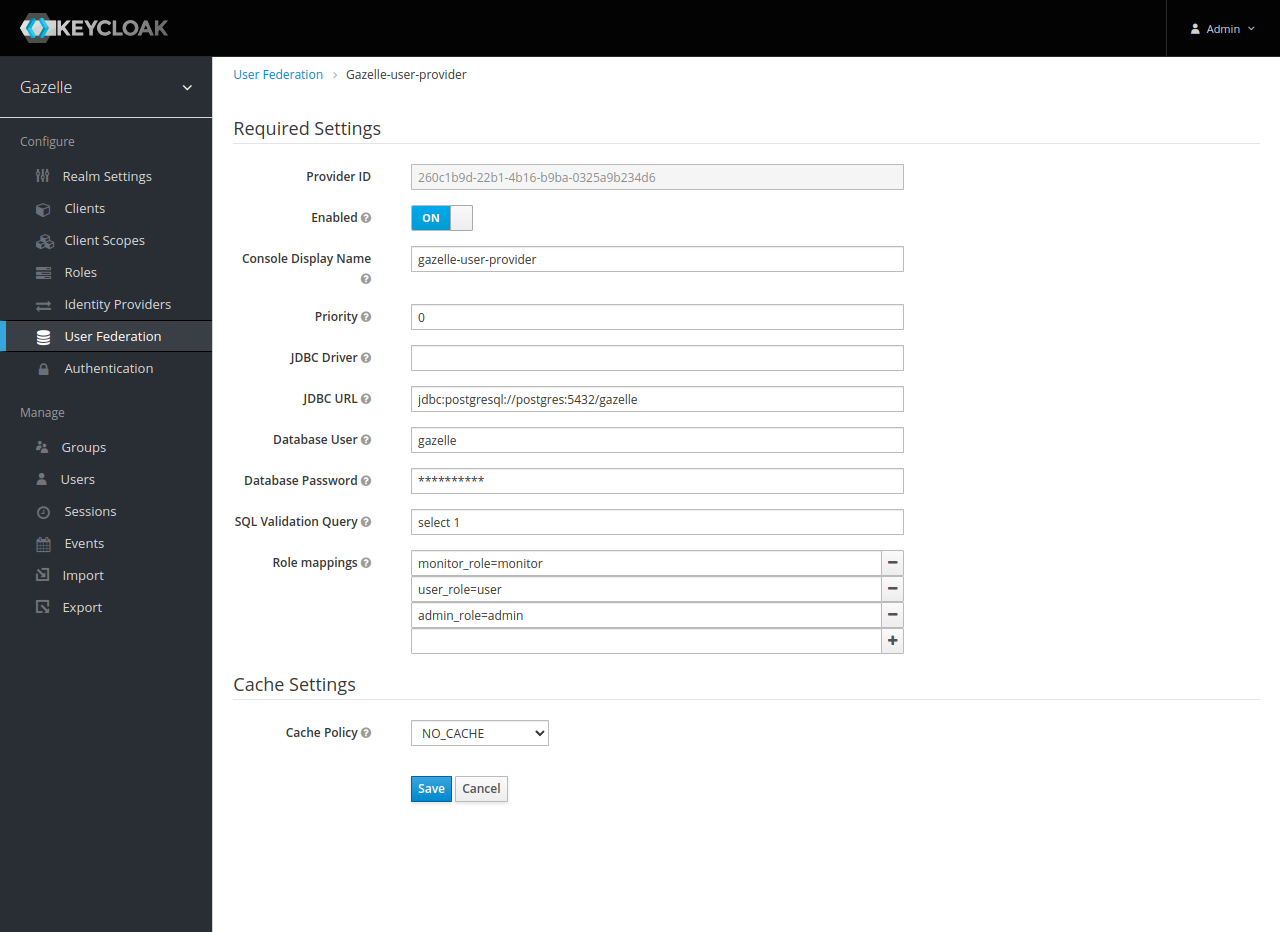
First, let’s add a user federation source to check everything is OK. Click on “User Federation” menu item, select “gazelle-user-provider”.
Configure the provider, letting it connect to Test Management database.
- JDBC URL : where is the database
- Database User/Database Password : DB credentials
- Cache Policiy : set to NO_CACHE for fetching user details every time (keeps Keycloak in sync with Gazelle)
- Role mappings : allows to add a Keycloak role to user if user has a role in Gazelle
- it allows to map roles directly here at realm level, useful for services calling
userinfoOIDC endpoint to retrieve roles (ex : Rocket.chat) - format is
gazelle_role=keycloak_role - add as many mappers as needed
- these mappers are called everytime user is retrieved, allowing late configuration
- it allows to map roles directly here at realm level, useful for services calling
DB configuration is checked when user federation configuration is saved.
Gazelle users
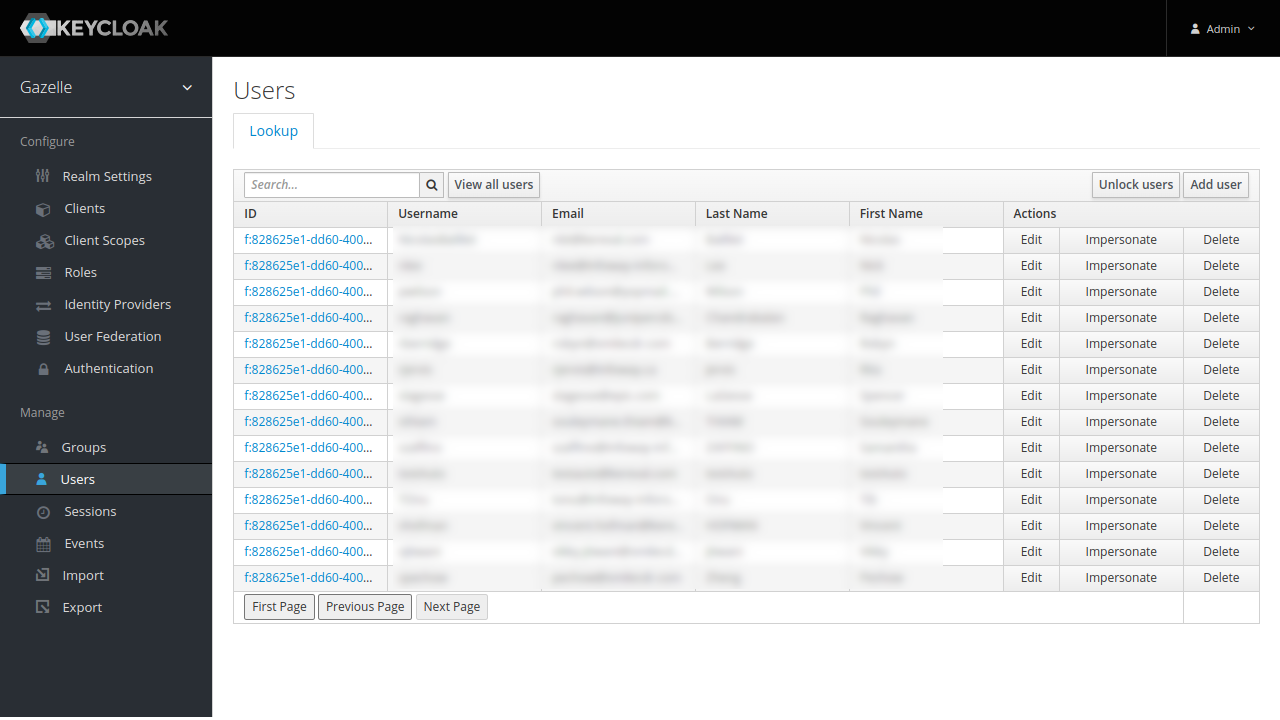
Now it is possible to list users from Gazelle in “Users” menu entry.
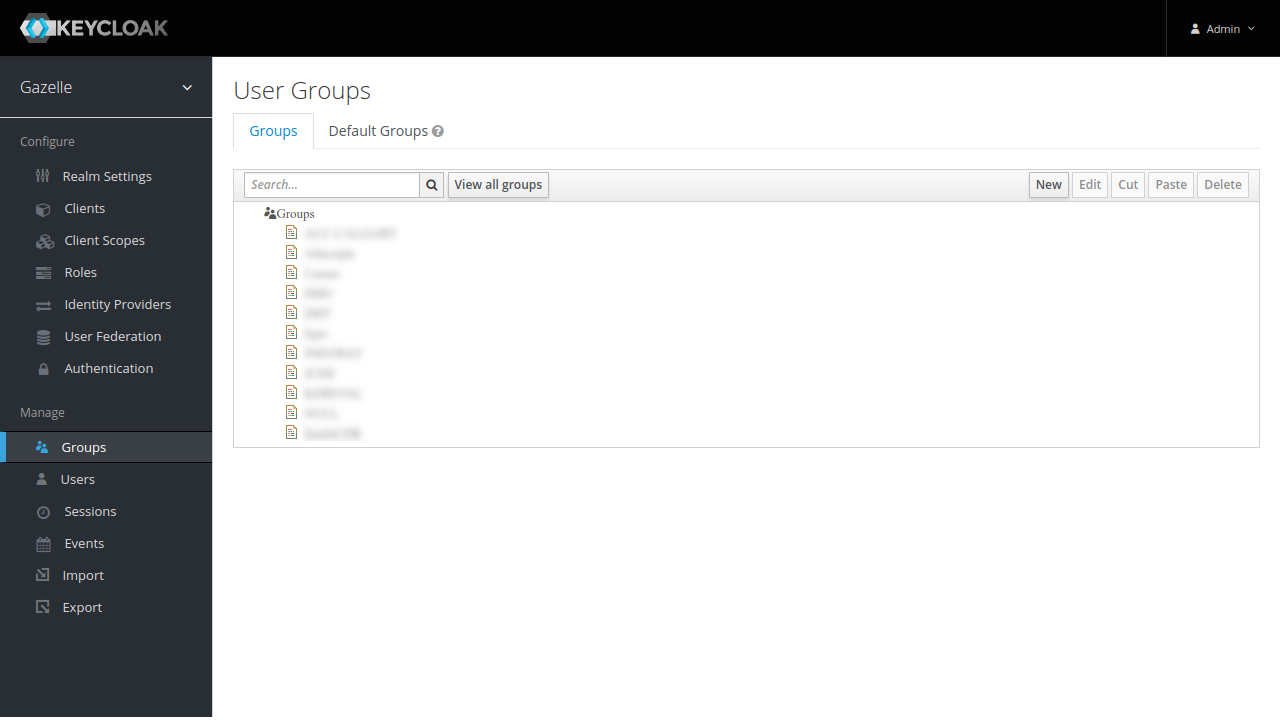
Gazelle institutions
Also, a group has been created for each institution linked to fetched users. The group name is the institution keyword.
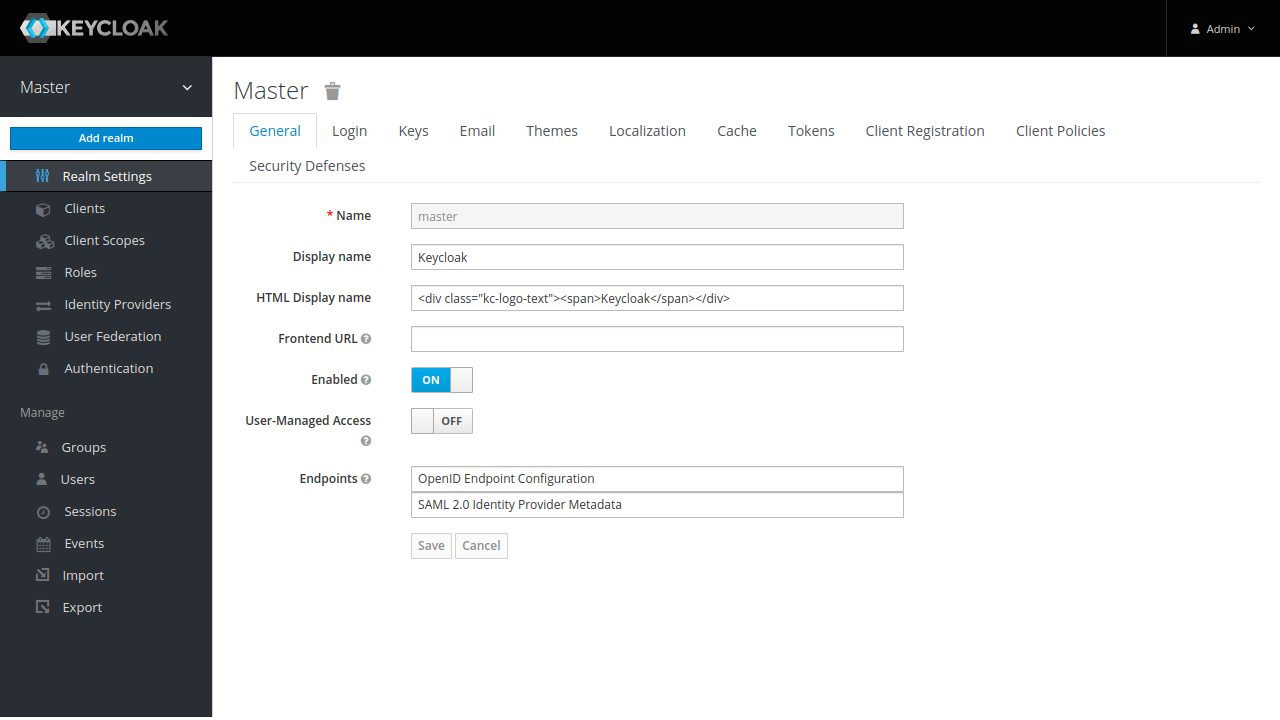
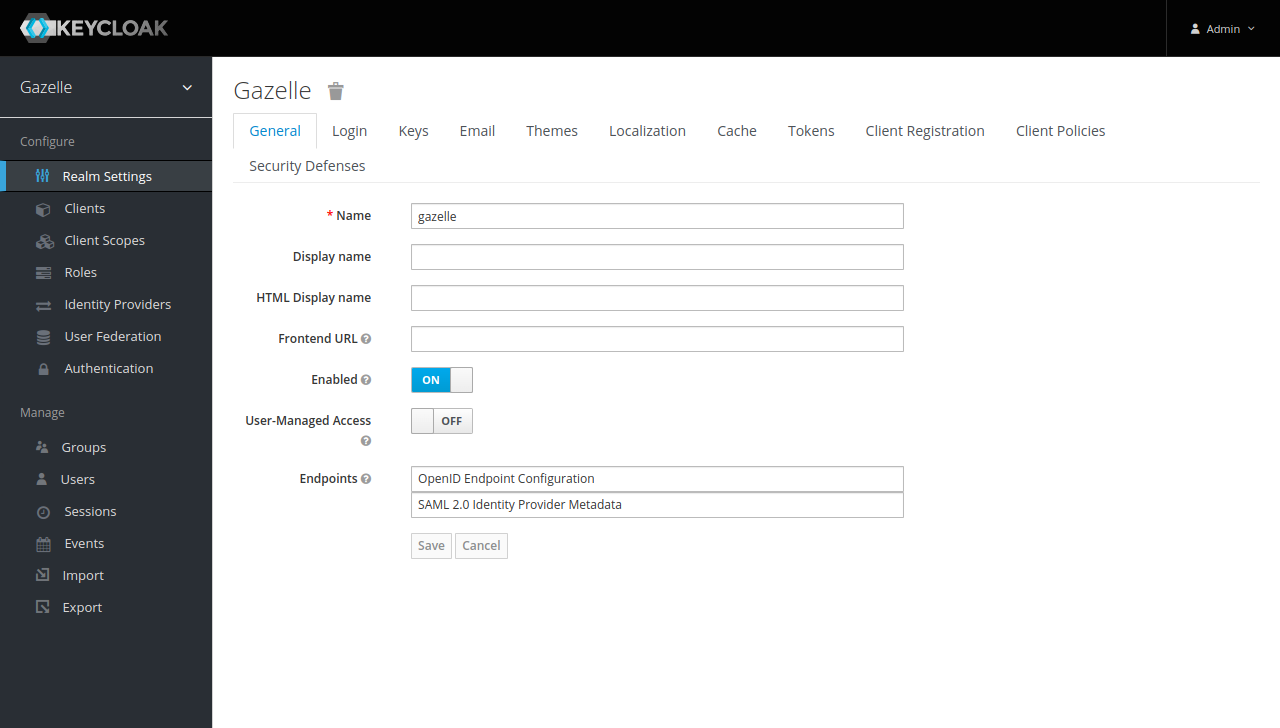
Realm settings
Now let’s focus on realm configuration. Click on “Realm settings”.
- Leave “gazelle” as “Name”, this used in URLs
- Remove “Display name” and “HTML Display name” if something is set.
- Keep “Enabled” to “ON”
- Keep “User-Managed Access” to “OFF”
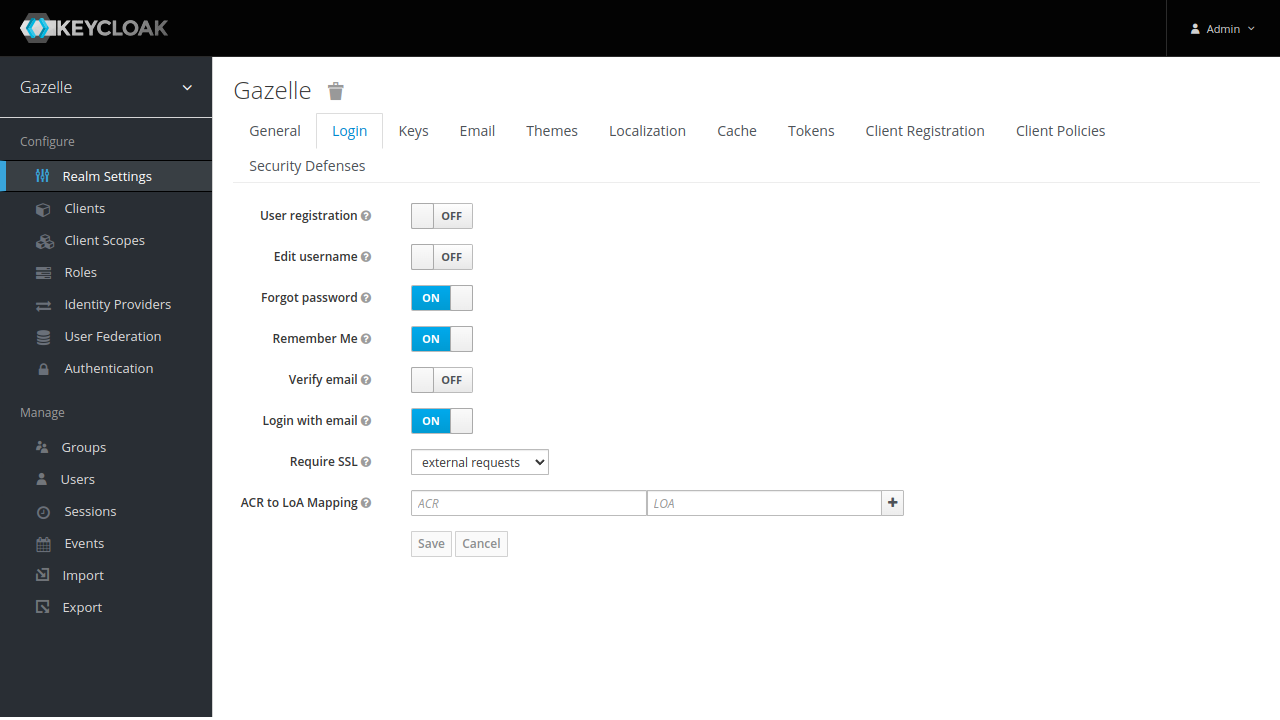
Login configuration
In login tab, make important changes :
- Activate “Forgot password” (user will be able to reset its password from Keycloak)
- Activate “Remember Me” (user will not have to login again and again)
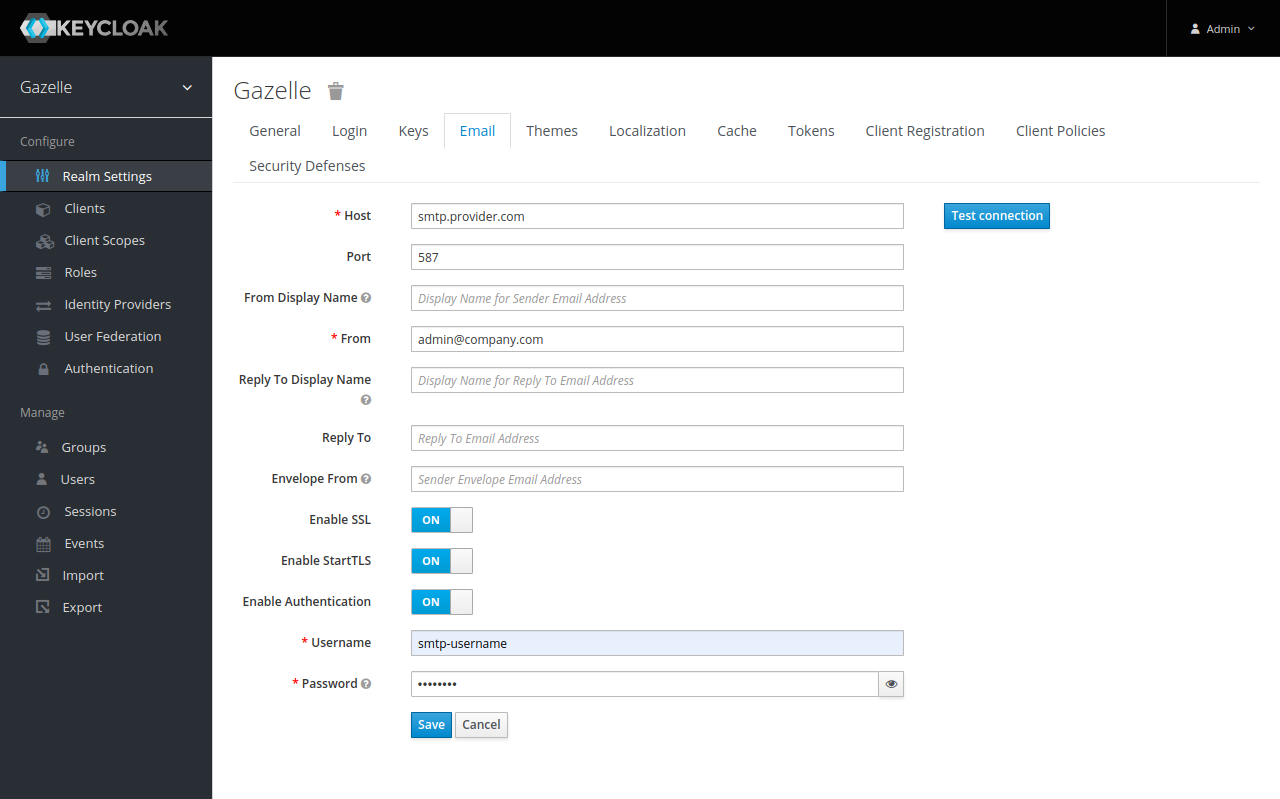
SMTP configuration
Configuration the SMTP server.
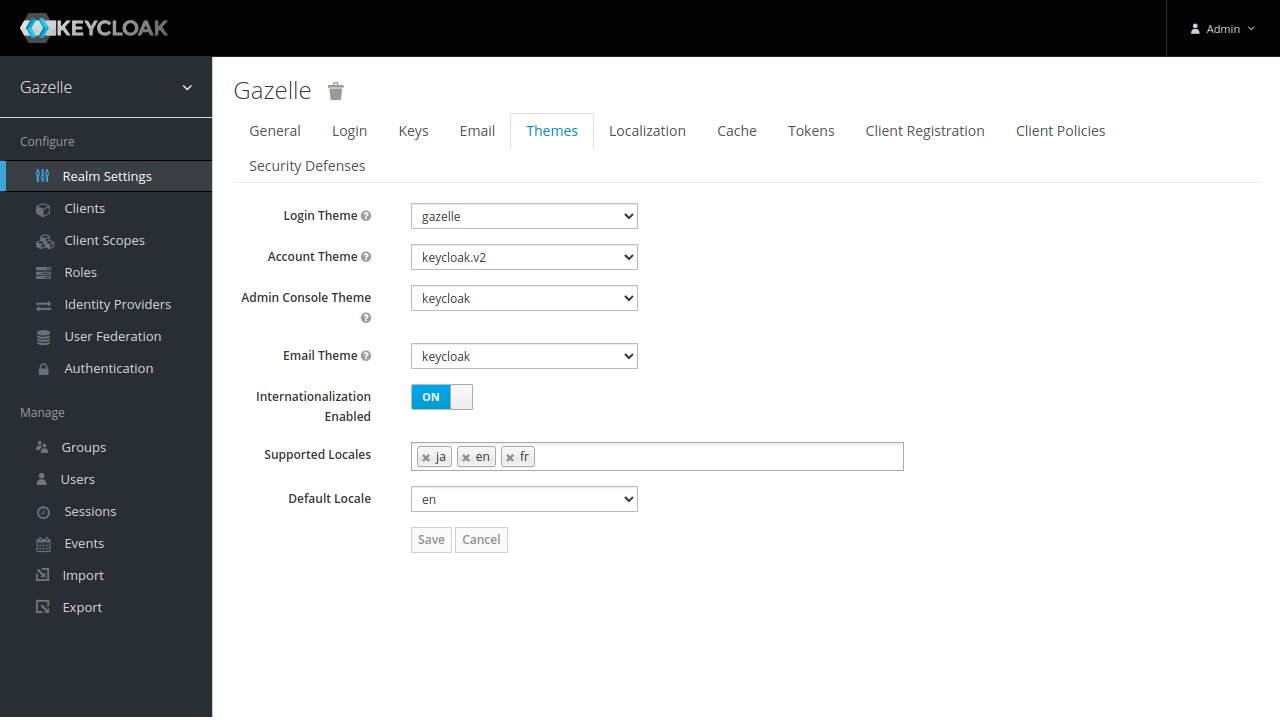
Themes configuration
Change Themes settings :
- set “Login Theme” to “gazelle”
- set “Account Theme” to “keycloak.v2”
- set “Admin Console Theme” to “keycloak”
- set “Email Theme” to “keycloak”
- Activate “Internationalization Enabled”
- Select “Supported Locals”
- Choose a “Default Locale”
Account
User can access its account with http(s)://<keycloak hostname>/realms/gazelle/account.
In any case, user will not be able to change username, email and name. These are managed by Gazelle user federation.
A user should still be able to activate OTP or change its password.
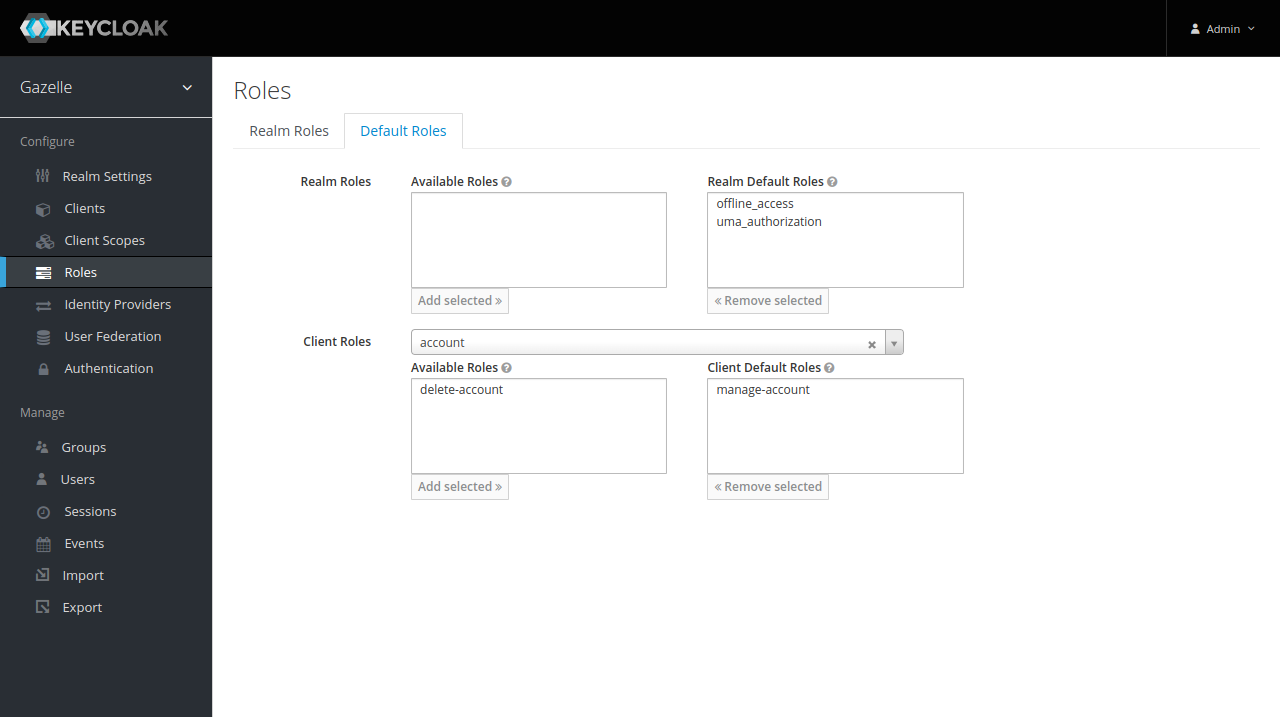
Account modification is allowed if user has role manage-account in account client.
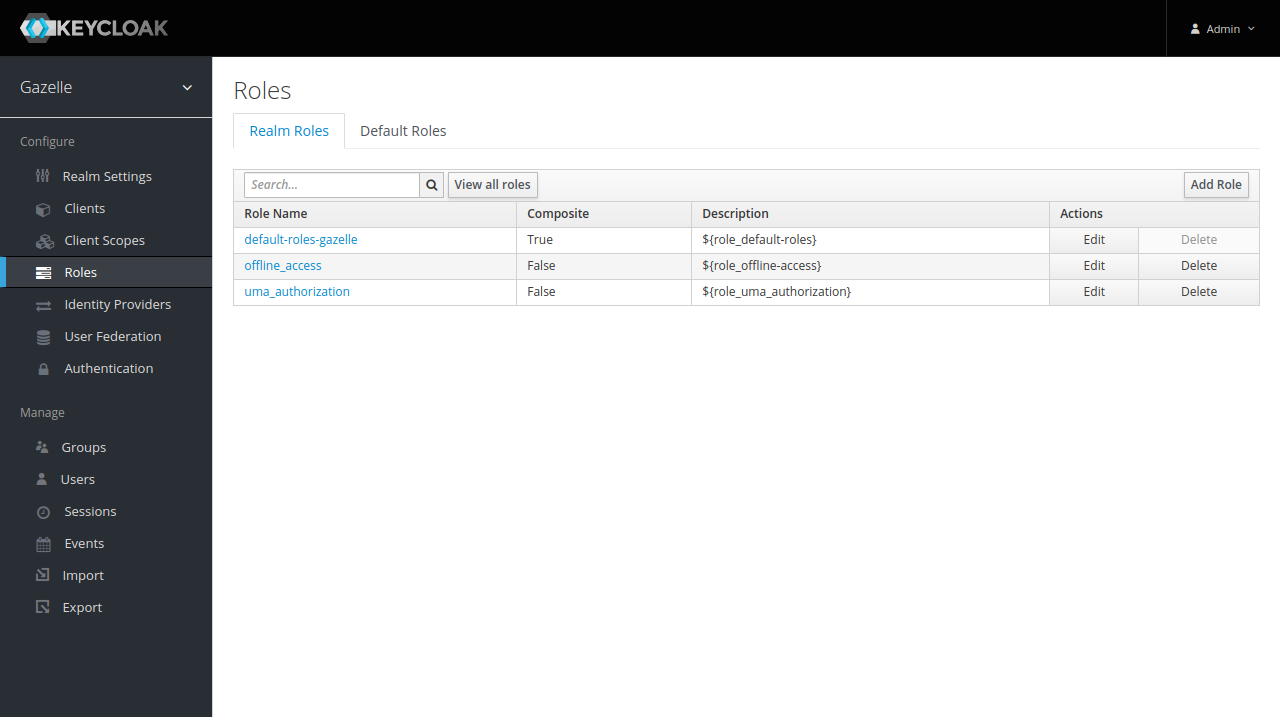
Click on “Roles” in menu.
Click on “default-roles-gazelle”.
Select “Default Roles” tab and select “account” in “Client Roles”.
Add manage-account to “Client Default Roles” by clicking on “Add selected »”.
Clients
For applications being able to use Keycloak to connnect, clients must be created. Clients are configured by clicking on “Clients” in menu.
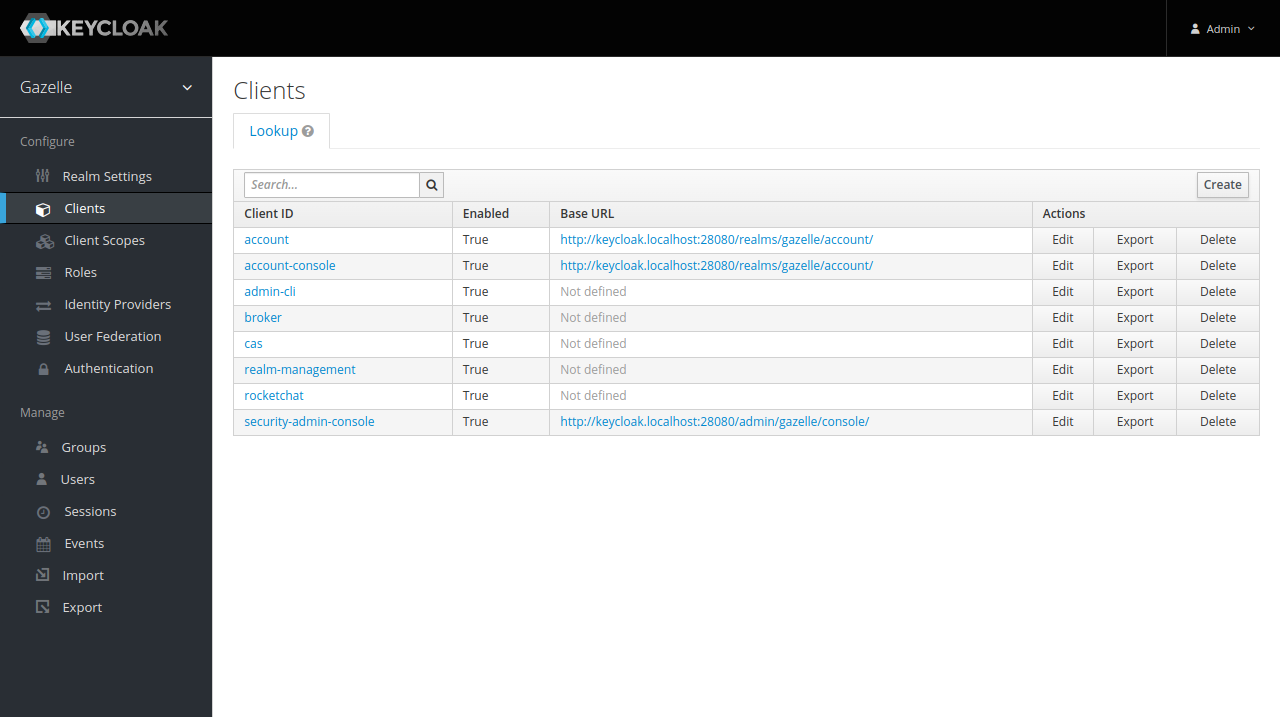
CAS
For using Keycloak with legacy applications using CAS, click on “Create” on upper left.
- Client ID : cas
- Client Protocol : cas
Click on Save

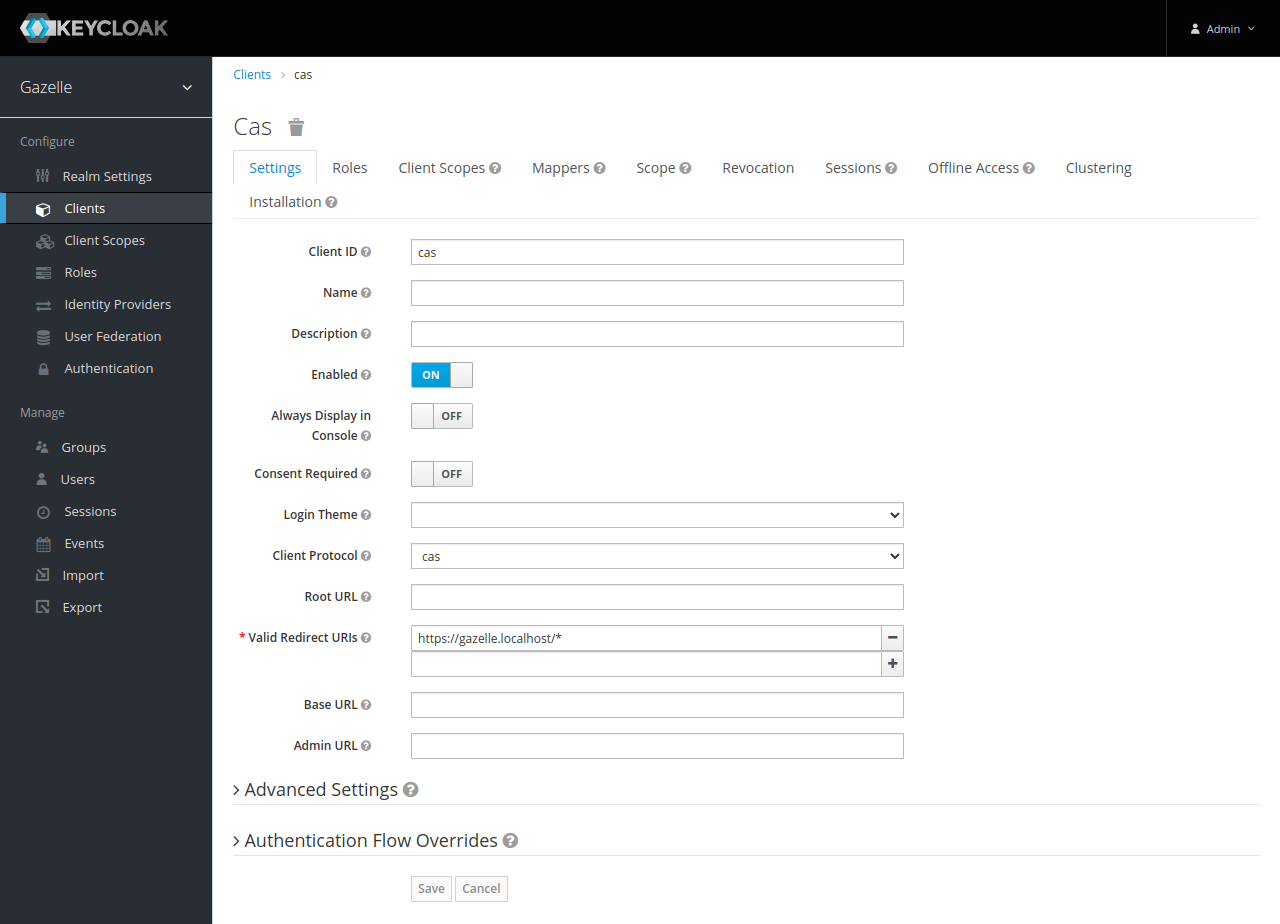
Now configure the CAS client.
Settings tab
- in “Valid Redirect URIs”, add all URL patterns of applications using CAS
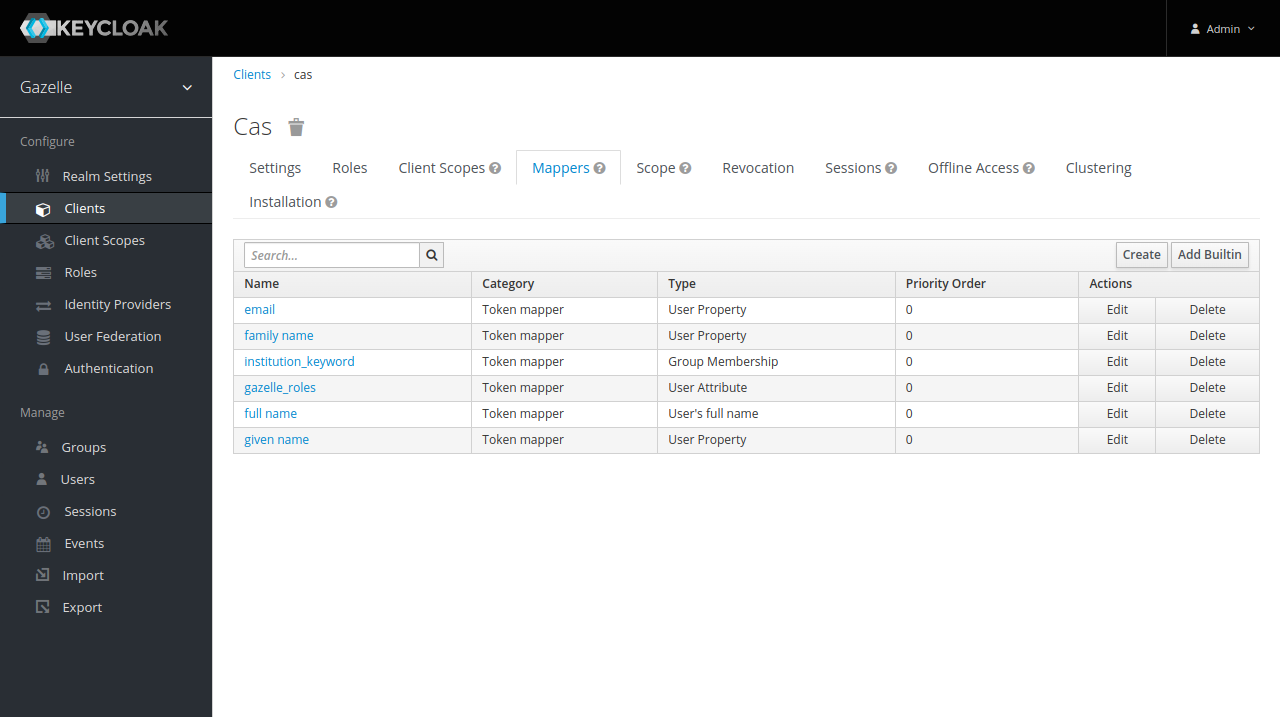
Mappers tab
We want roles and institutions in CAS ticket for legacy applications.
Click on “Create” to create a new mapper
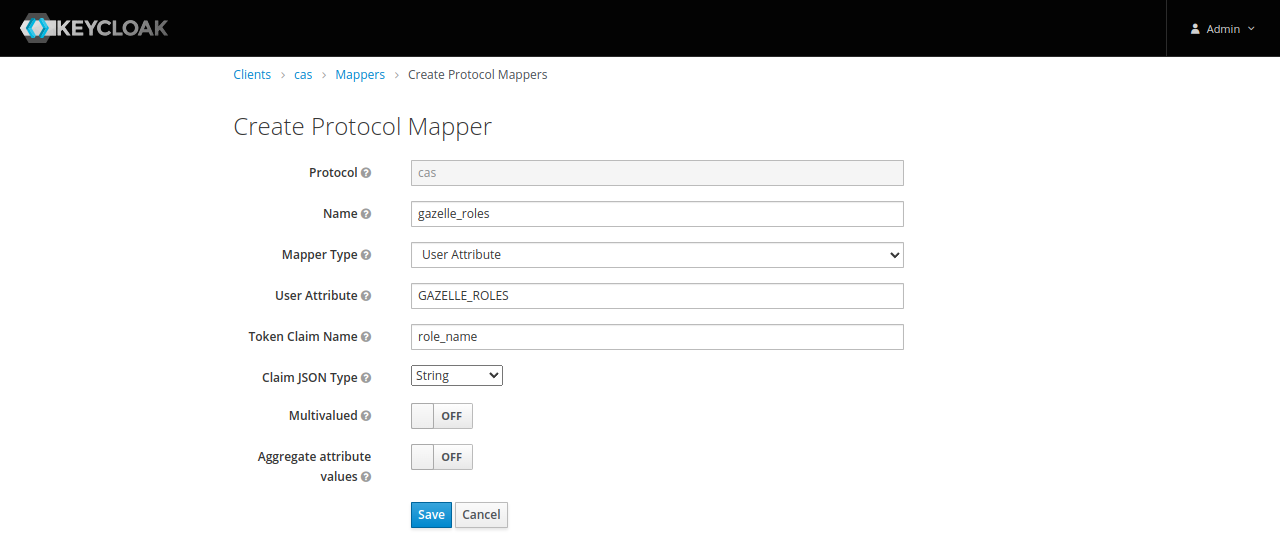
Roles
Add a mapper for Gazelle roles :
- Name : gazelle_roles
- Mapper Type : User Attribute
- User Attribute : GAZELLE_ROLES
- Token Claim Name : role_name
- Claim JSON Type : String
- Multivalued : OFF
- Aggregate attribute values : OFF
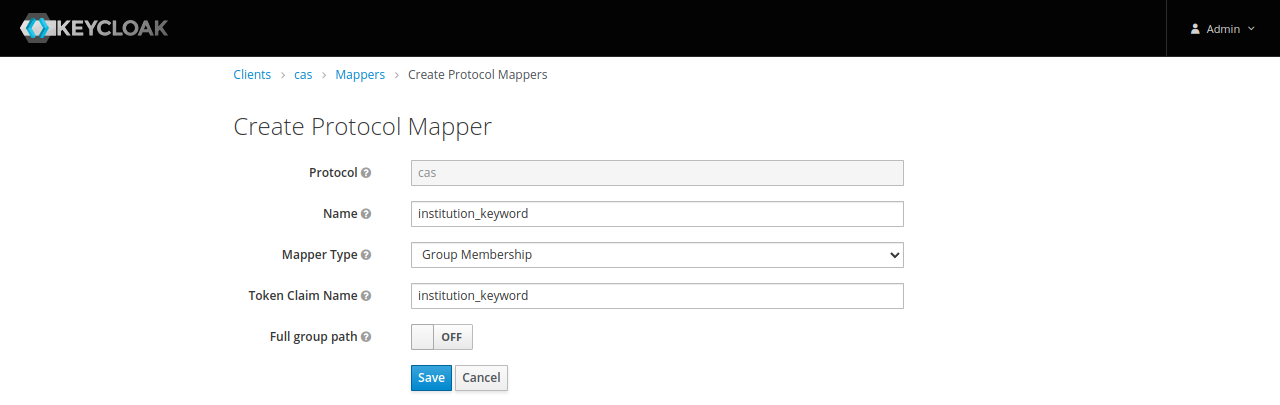
Institutions
Add a mapper for Gazelle institution :
- Name : institution_keyword
- Mapper Type : Group Membership
- Token Claim Name : institution_keyword
- Full group path : OFF
URLs
CAS protocol is now ready to be used with following URLS :
- login :
http(s)://<keycloak hostname>/realms/gazelle/protocol/cas/login - logout :
http(s)://<keycloak hostname>/realms/gazelle/protocol/cas/logout
OIDC
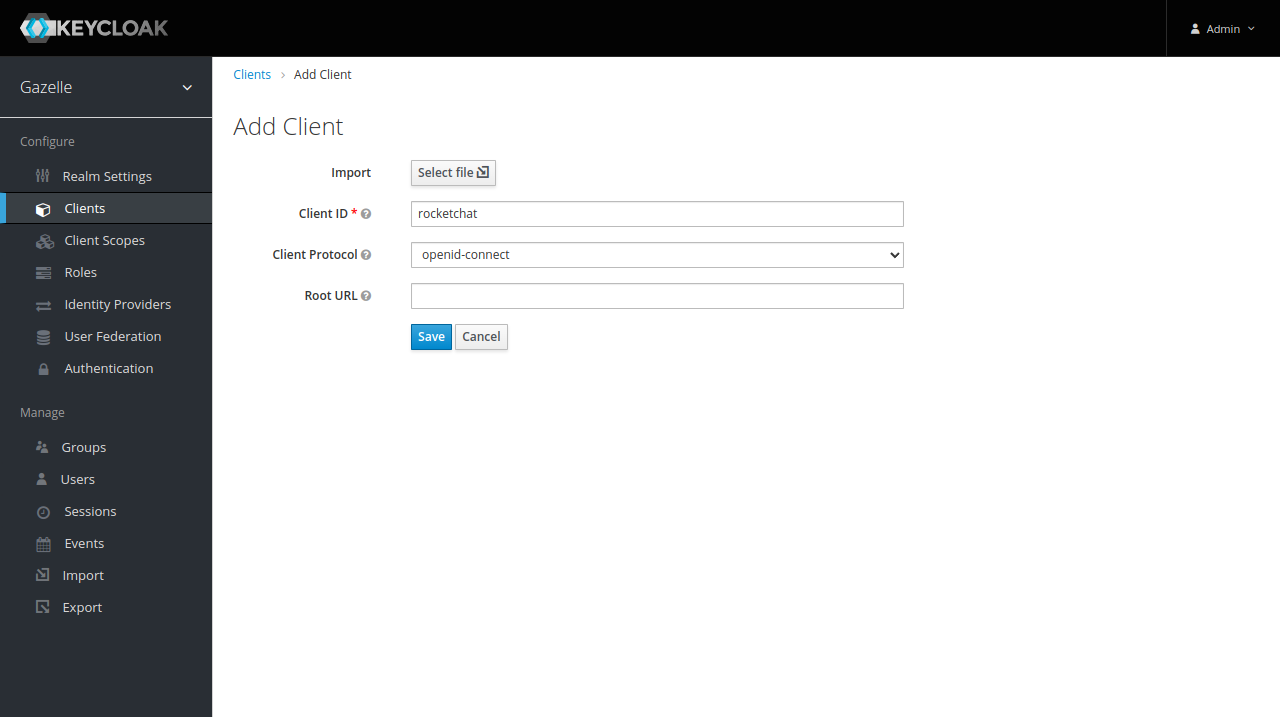
For using Keycloak with an application supporting OIDC, click on “Create” on upper left.
- Client ID : application_name (replace with a keyword for application)
- Client Protocol : openid-connect
Click on Save
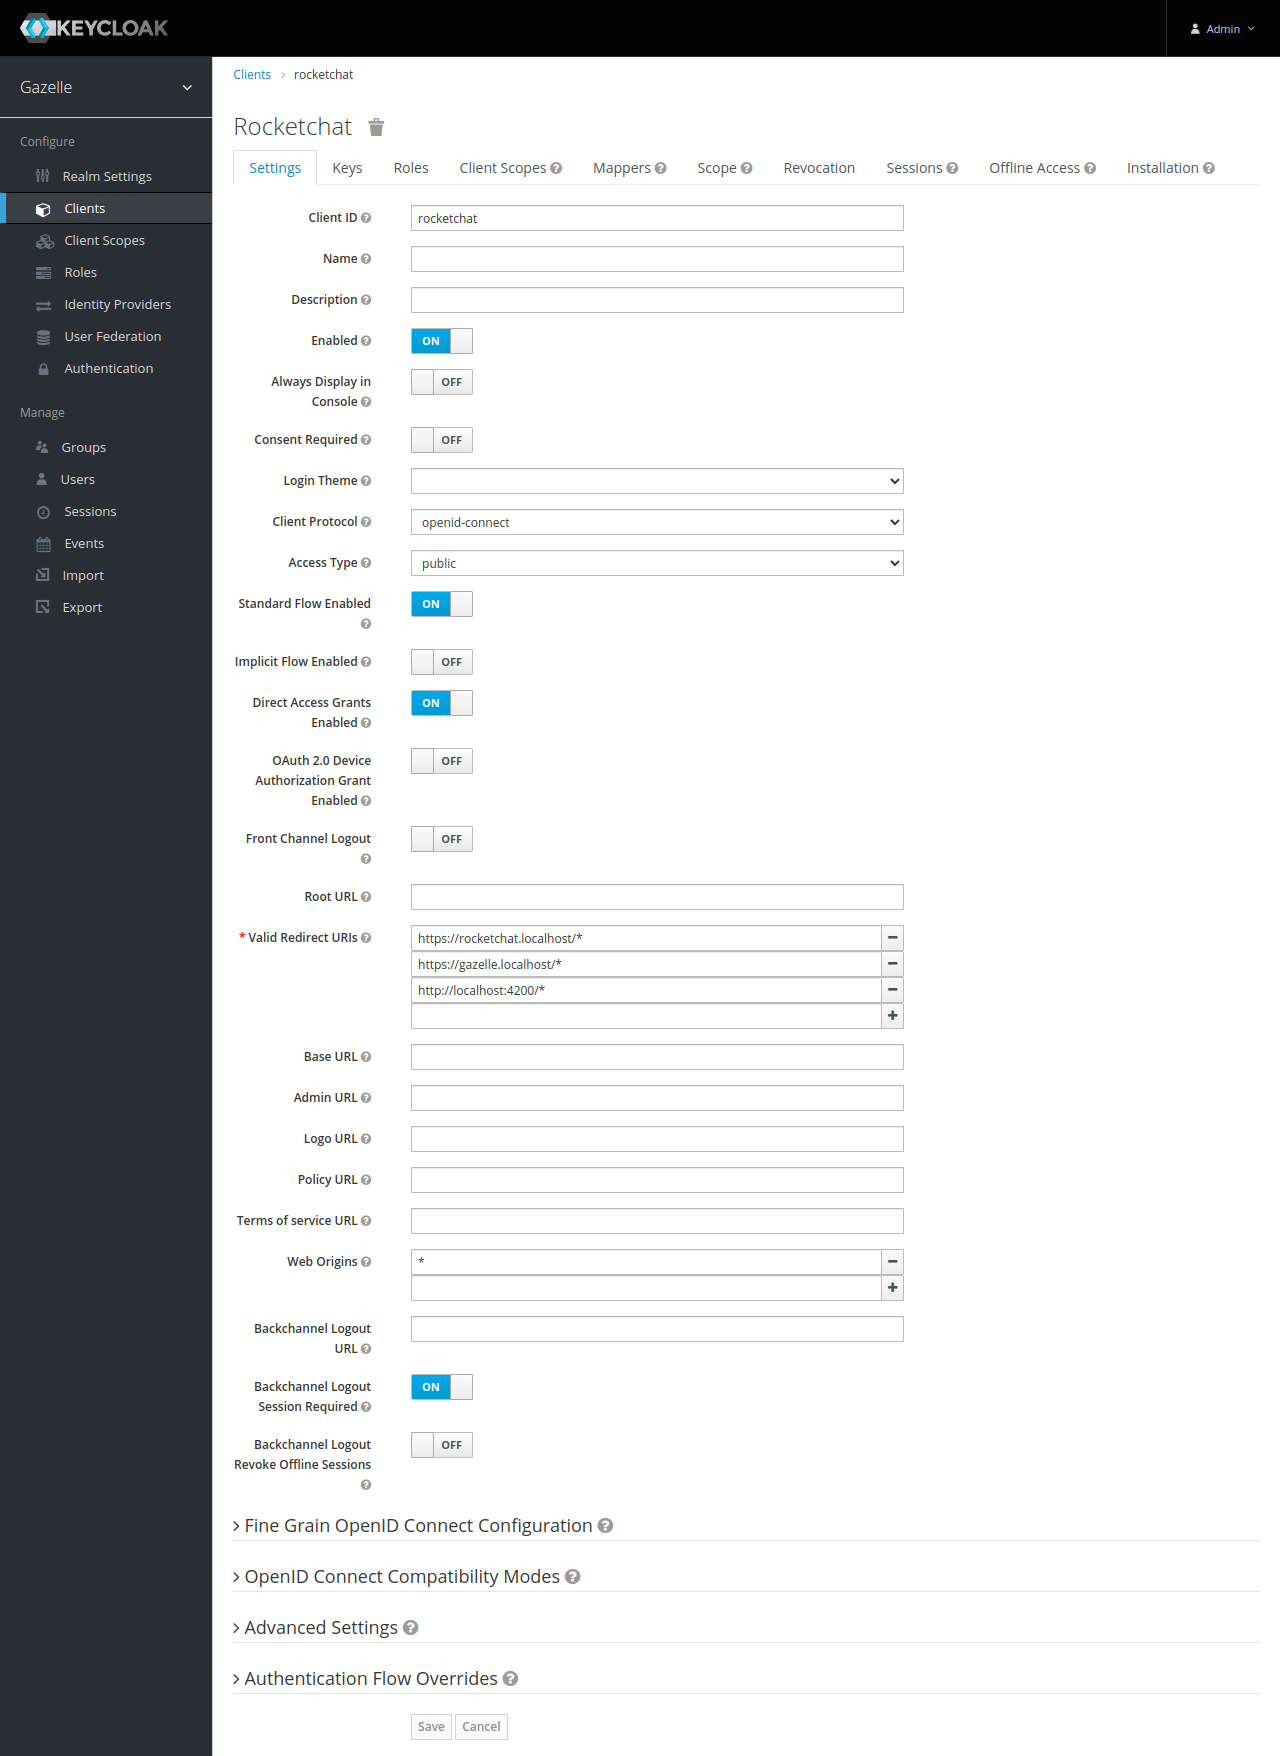
Now configure the OIDC client.
Settings tab
- in “Valid Redirect URIs” and “Web Origins”, add all URL patterns of the application
Mappers tab
We want roles and institutions in tokens and userinfo endpoint.
Click on “Create” to create a new mapper
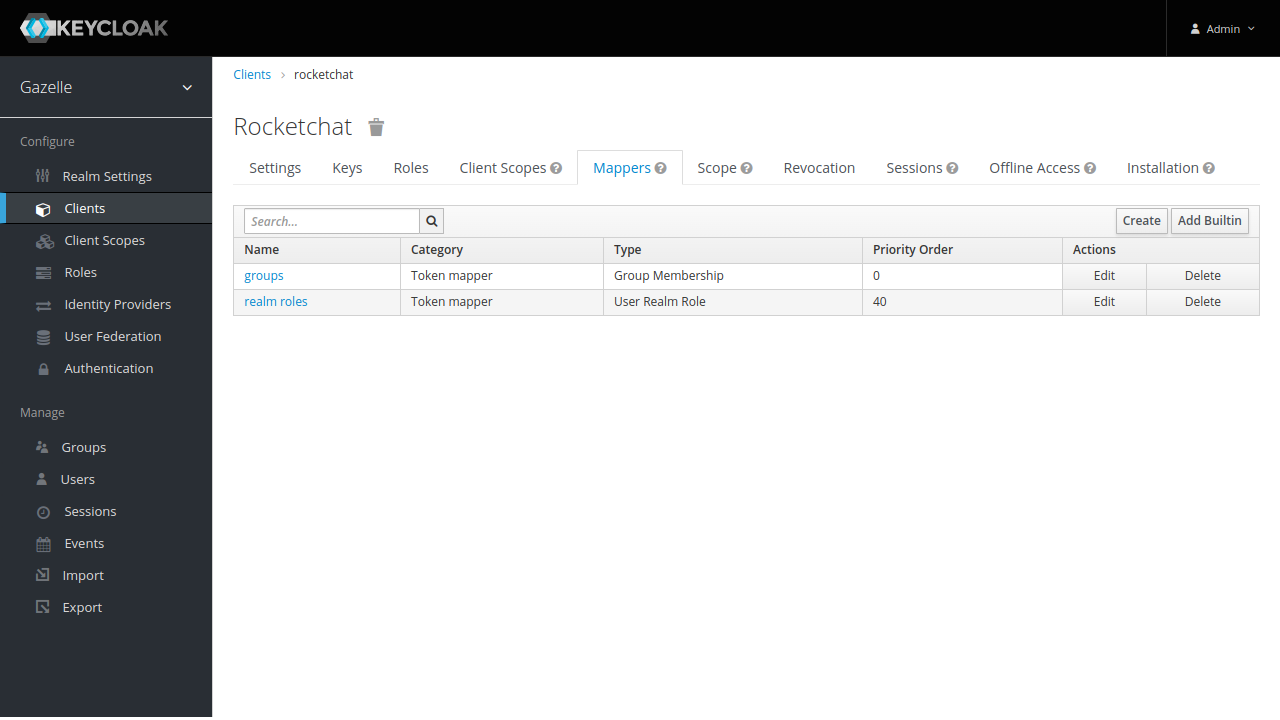
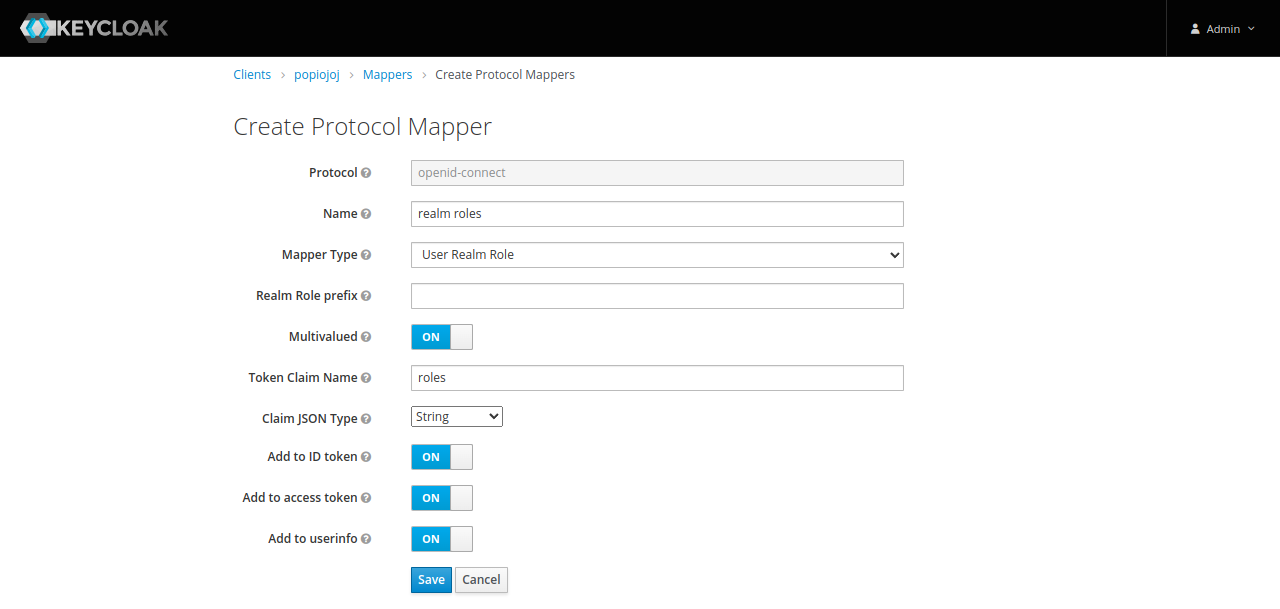
Roles
Add a mapper for Gazelle roles :
- Name : realm roles
- Mapper Type : User Realm Role
- Realm Role prefix :
- Multivalued : ON
- Token Claim Name : roles
- Claim JSON Type : String
- Add to ID token : ON
- Add to access token : ON
- Add to userinfo : ON
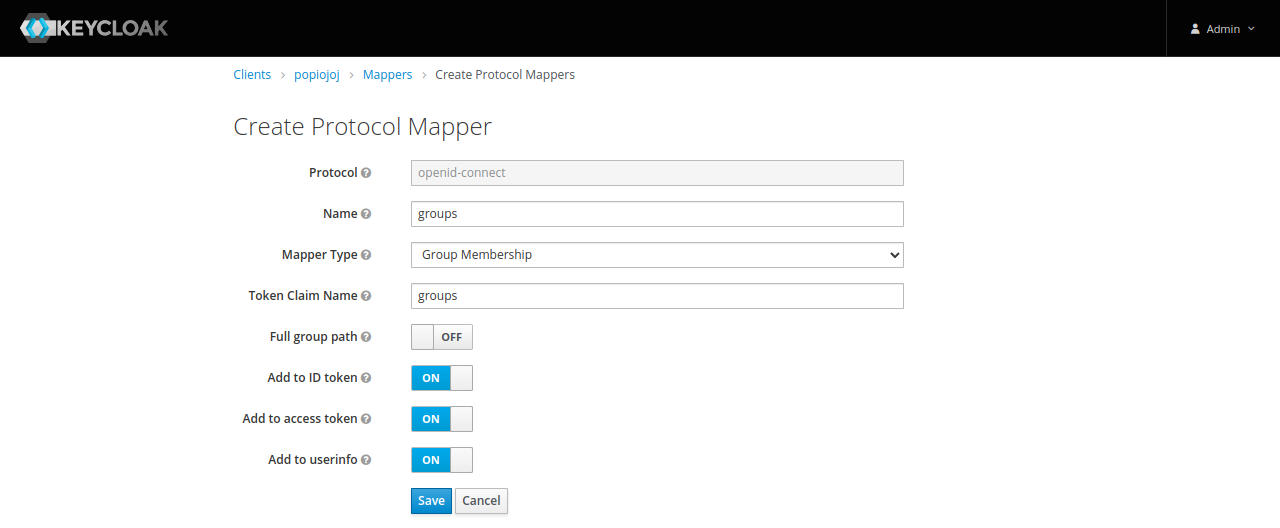
Institutions
Add a mapper for Gazelle institution :
- Name : groups
- Mapper Type : Group Membership
- Token Claim Name : groups
- Full group path : OFF
- Add to ID token : ON
- Add to access token : ON
- Add to userinfo : ON
URLs
OIDC client is now ready to be used with following configuration :
- well-known :
http(s)://<keycloak hostname>/realms/gazelle/.well-known/openid-configuration - client id : specified in client
- auth URL :
http(s)://<keycloak hostname>/realms/gazelle/protocol/openid-connect/auth - token URL :
http(s)://<keycloak hostname>/realms/gazelle/protocol/openid-connect/token - userinfo URL :
http(s)://<keycloak hostname>/realms/gazelle/protocol/openid-connect/userinfo